


Summer's here, and what better way to embrace the season than with vibrant cherry-colored nail art? These 15 irresistible DIY designs will not only brighten your look but also encapsulate the playful essence of summer vibes.
Whether you’re lounging by the pool, attending a garden party, or simply enjoying a sunny day out, cherry-coded nails can be the perfect accessory to elevate your style. From luscious cherry red to playful pastel hues, these designs are sure to make your nails a statement piece. Get ready to turn heads and inspire envy with every hand wave and gesture!
Let's get creative and transform your look with these stunning nail art ideas that celebrate the cherry colors of summer!
Contents
- 1. Classic Cherry Red Elegance
- 2. Ombre Cherry Delight
- 3. Cherry Blossom Accents
- 4. Cherry Fruit Slice Nails
- 5. Cherry Dot Design
- 6. Cherry French Tips
- 7. Cherry Glitter Glam
- 8. Cherry Marble Effect
- 9. Cherry Stripes
- 10. Cherry Watercolor Effect
- 11. Cherry Animal Print
- 12. Cherry Confetti
- 13. Cherry Gradient Glitter
- 14. Cherry Lace Design
- 15. Cherry Tie-Dye
1. Classic Cherry Red Elegance
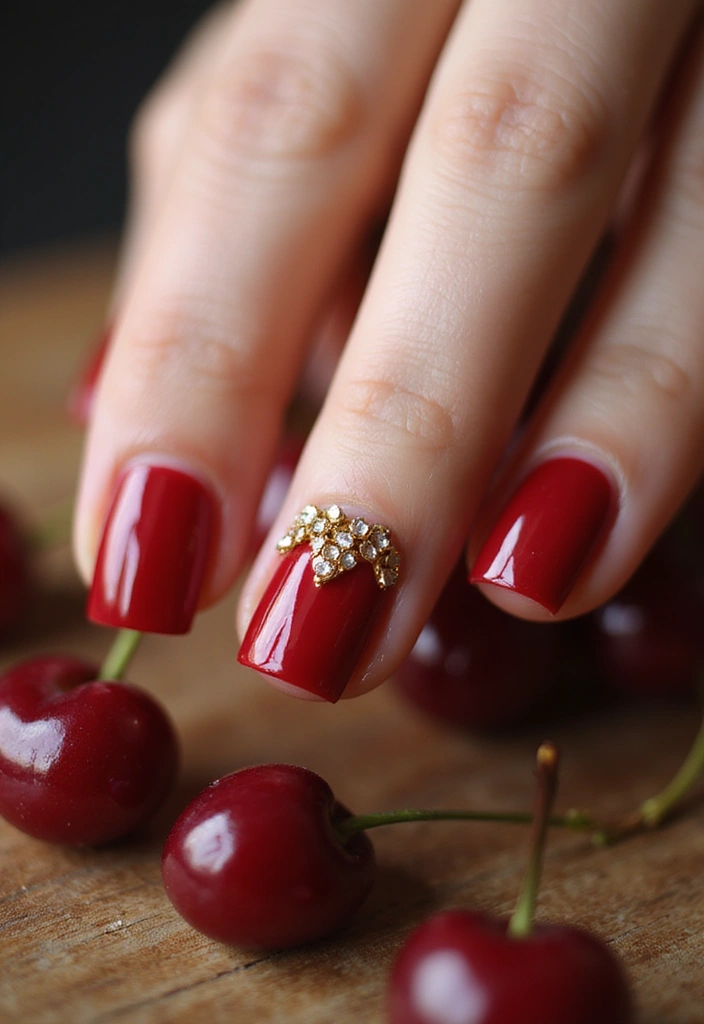
Nothing says classic like a bold cherry red nail. This timeless hue is perfect for any occasion, exuding confidence and sophistication.
To achieve this look, start with a clean nail bed, applying a base coat to protect your nails. Follow with two coats of a rich cherry red polish, ensuring even coverage. Finish with a glossy top coat for a professional shine.
This design can be easily paired with gold or silver accents, such as tiny rhinestones at the base of each nail or metallic stripes for a chic twist. It's a versatile look that can transition seamlessly from day to night, making it a must-try for anyone wanting to make a lasting impression.
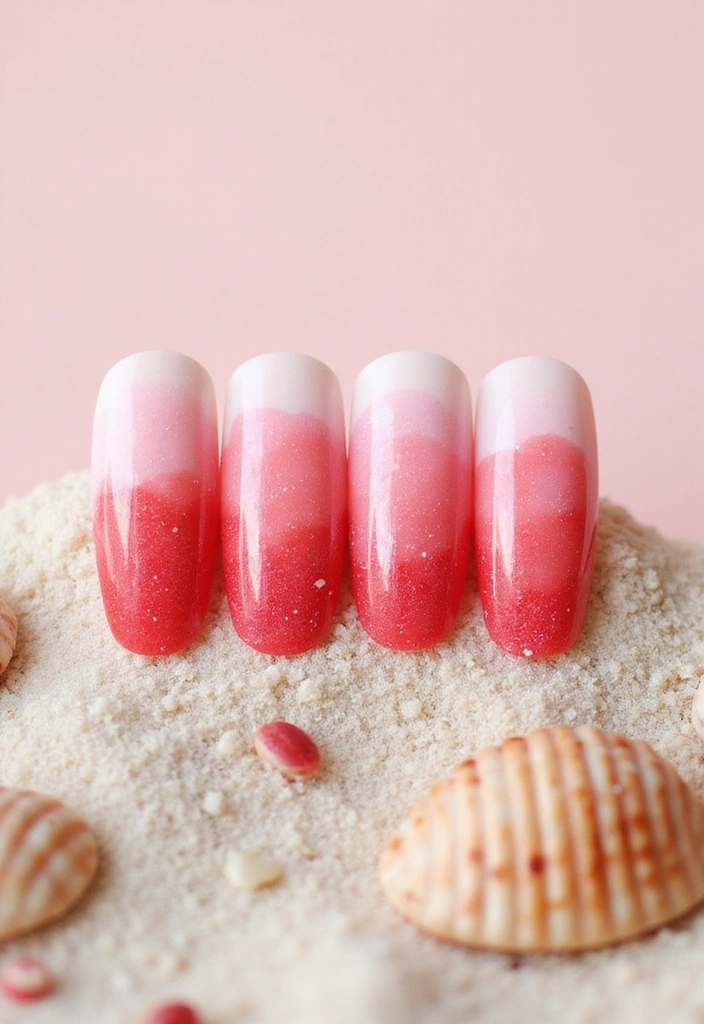
2. Ombre Cherry Delight
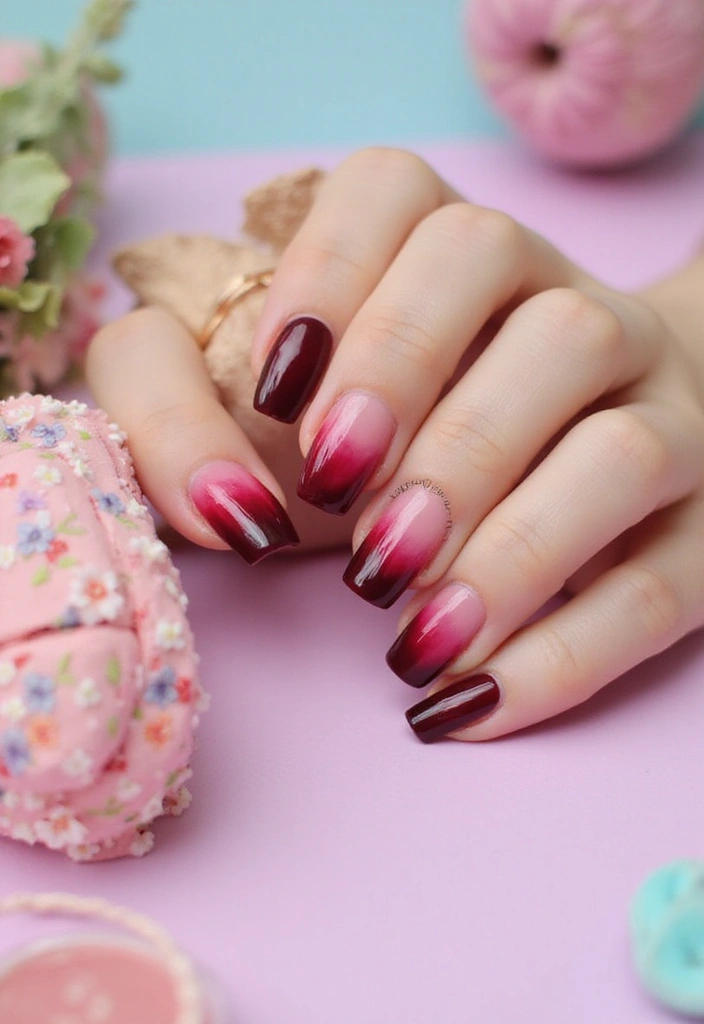
Create a stunning ombre effect that transitions from deep cherry red to a soft pink. This gradient look is not only visually appealing but also very trendy for the summer.
Start by applying a base coat and two layers of your darkest red polish. Once dry, use a makeup sponge to dab on the lighter pink polish, blending it seamlessly into the red. To perfect the ombre, gently sponge away any harsh lines, and finish with a top coat to seal the design.
This nail art style beautifully showcases the duality of summer—it's both bold and soft, making it perfect for any outfit or occasion. Pair it with floral outfits for an extra summer vibe!
3. Cherry Blossom Accents
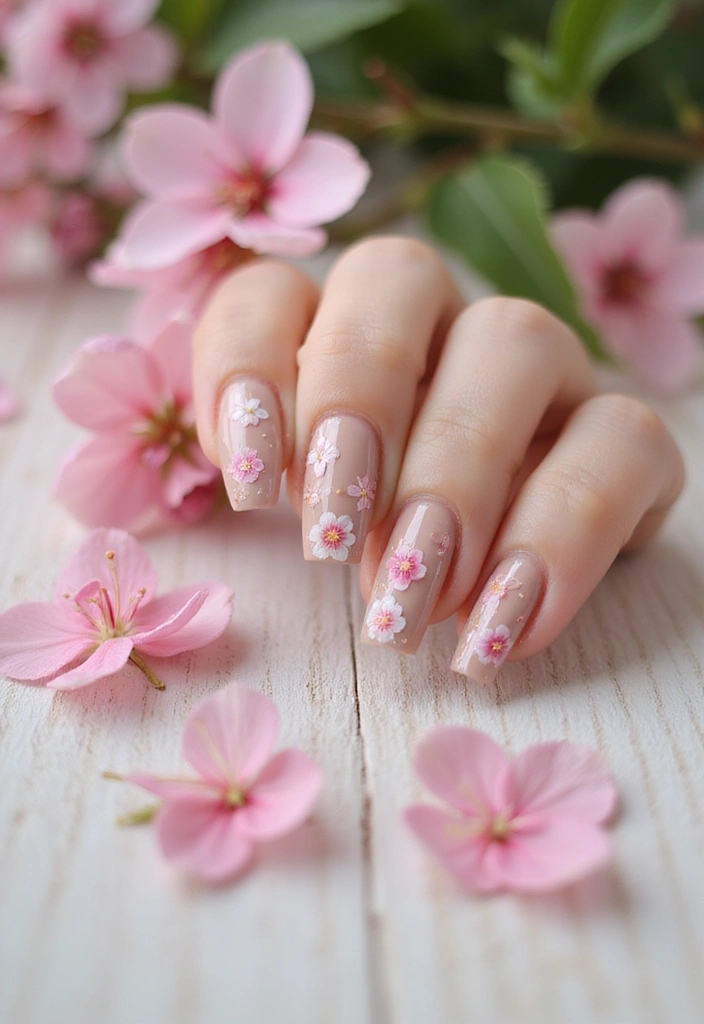
Celebrate the beauty of cherry blossoms with delicate nail art inspired by these lovely flowers. This design is perfect for adding a touch of elegance to your nails.
Begin with a soft nude or pale pink base coat. Once dry, use a thin brush to paint small cherry blossoms with white and pink polish, adding tiny green leaves for contrast. This artistic approach can be a bit challenging but the results are undeniably beautiful.
Finish with a matte or glossy top coat to enhance the design. This look is perfect for summer weddings or special occasions, bringing a sense of nature’s beauty right to your fingertips!
4. Cherry Fruit Slice Nails
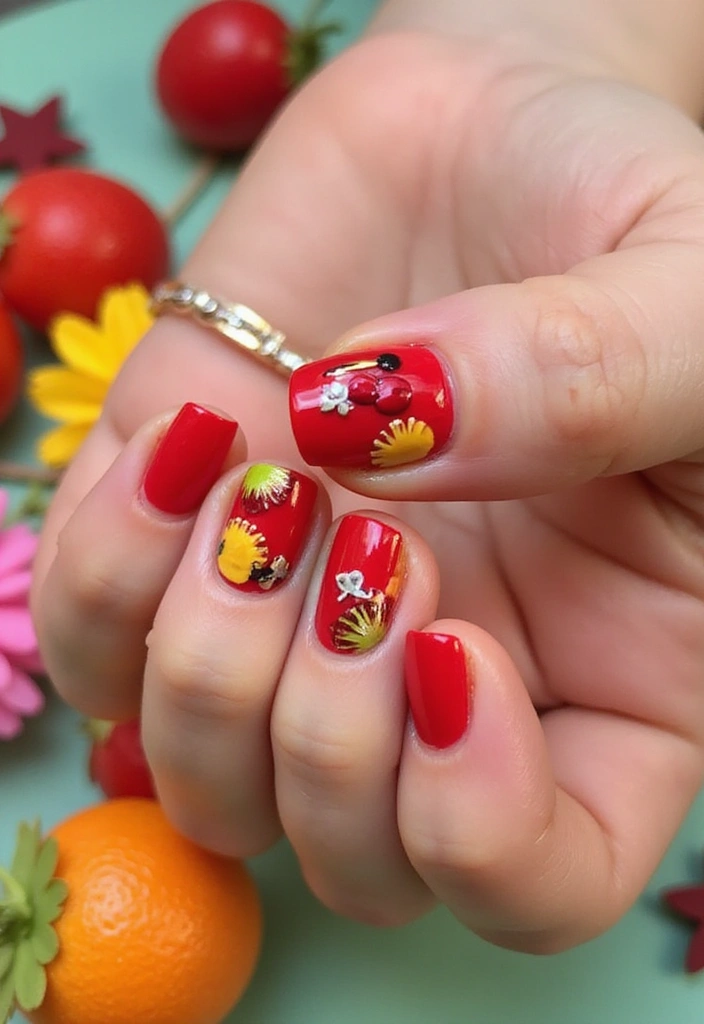
Add a playful twist to your nail art with cherry fruit slice designs that are fun and vibrant! This design is perfect for those who love to stand out with their nail art.
Start with a bright cherry red base coat. Once dry, use a thin brush to create slices of cherries on a few accent nails, featuring the red skin and the white flesh with tiny black seeds. This whimsical design is perfect for summer picnics or beach days.
To enhance the look, consider using a glossy top coat to make the colors pop even more. These nails are sure to bring smiles and compliments wherever you go!
5. Cherry Dot Design
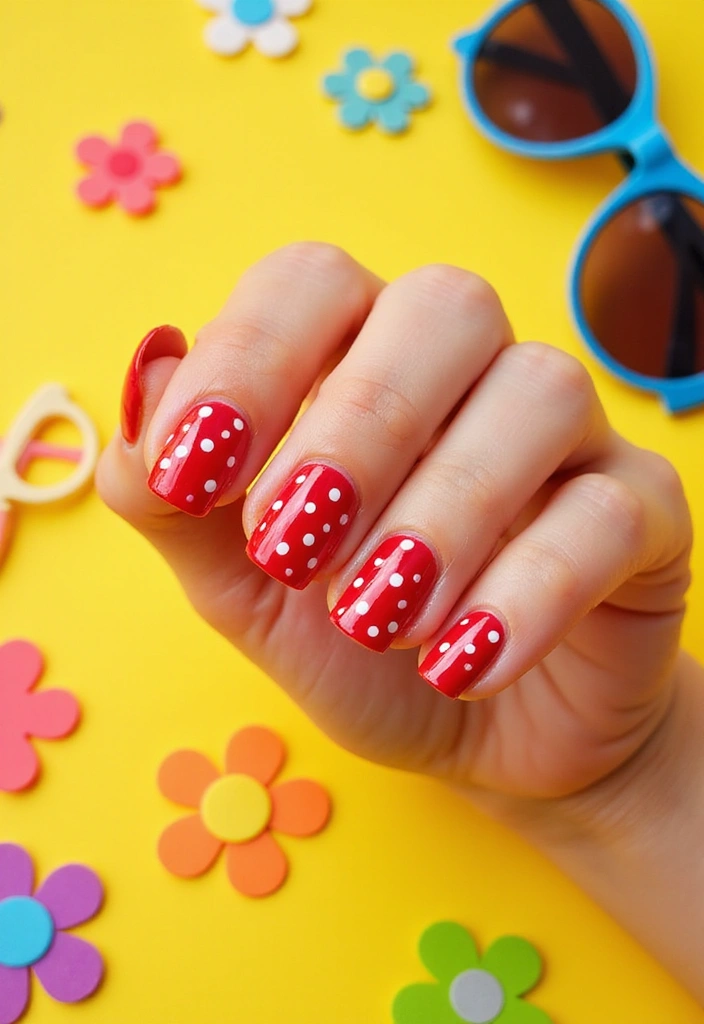
If you love simplicity with a pop of fun, the cherry dot design is for you! This style is easy to achieve and incredibly charming.
Start with a cherry red base coat and let it dry completely. Then, using a dotting tool or the end of a bobby pin, create white dots in varying sizes on top of the red polish. The pattern can be random or organized, depending on your style preference.
To finish, seal the design with a clear top coat for longevity. This playful design is perfect for casual outings and can easily match with any summer outfit. It's a hit for all age groups, making it a fabulous choice for gatherings!
6. Cherry French Tips

Give the classic French tip a fruity twist with cherry-colored tips! This design combines elegance with a fun summer twist, making it a must-try this season.
Begin with a sheer nude base coat, allowing your nails to look naturally beautiful. Once dry, paint the tips with a cherry red polish, ensuring a clean line. You can also add a slight diagonal angle for a modern twist. Finish with a glossy top coat for a polished look.
This design is perfect for both casual and formal occasions, embodying the essence of summer chic while keeping it classy.
7. Cherry Glitter Glam
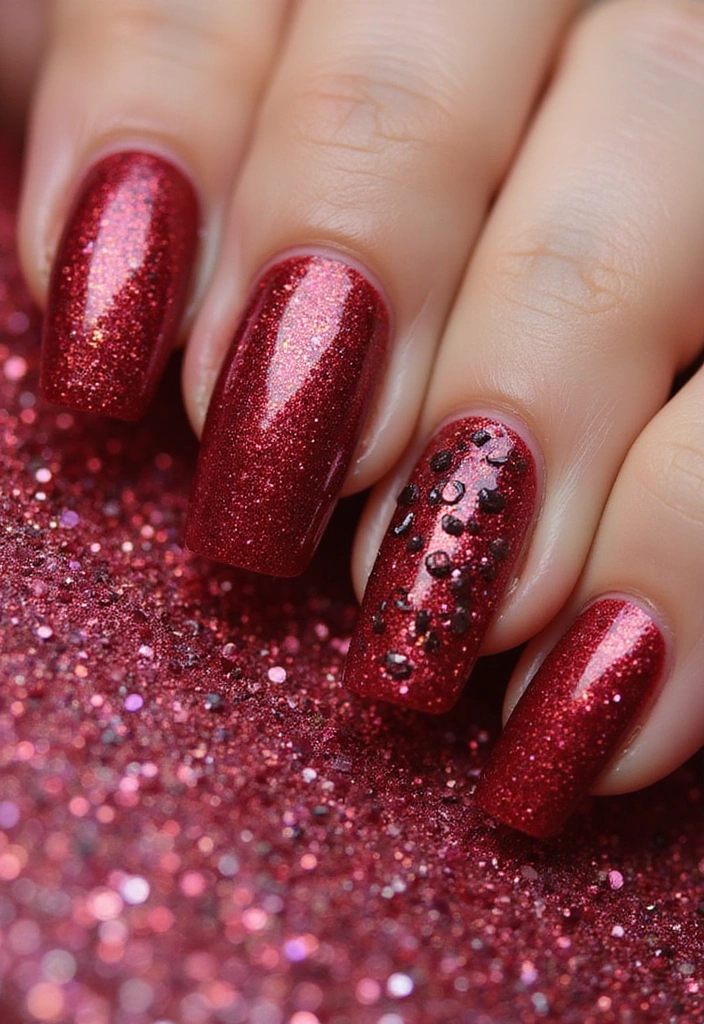
For those who love a bit of sparkle, cherry glitter nails are the way to go! This dazzling design is perfect for summer parties and night outs.
Start with a cherry red base coat. Once dry, apply a layer of fine red glitter polish to your nails, focusing on the tips for a gradient effect. For added glam, you can use larger glitter pieces or sequins on an accent nail. Finish with a thick top coat to ensure your glitter stays put and maintains its shine.
These nails are perfect for making a statement, allowing you to shine bright during those summer nights!
8. Cherry Marble Effect

Bring an artistic flair to your nails with a cherry marble effect that looks stunning and unique! This design mimics the beauty of marble stone and is perfect for those who love intricate nail art.
Start with a white base coat to allow the colors to pop. Then, using a small brush or a straw, swirl together cherry red and pink polishes to create a marbled effect on your nails. The key is to work quickly before the polish dries. Finish with a high-gloss top coat to seal the design.
This nail art trend will surely turn heads, making it a great choice for summer events or casual outings.
9. Cherry Stripes
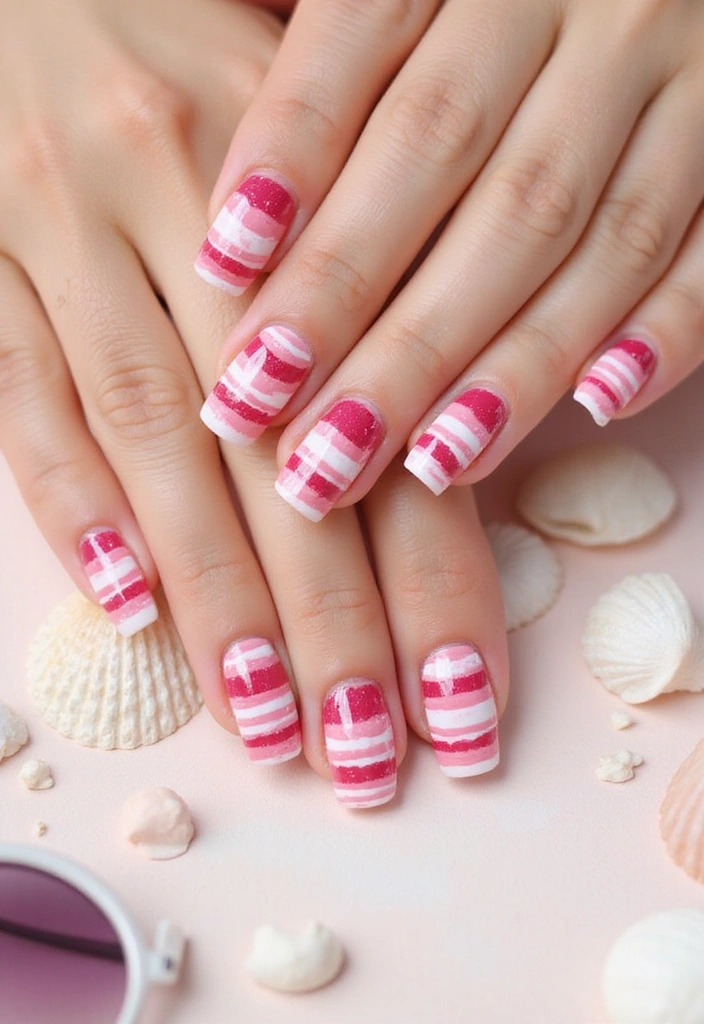
Stripes are timeless, and incorporating cherry colors into this design makes it fresh for summer! This design is easy to do and fun to experiment with.
Start with a cherry red base coat. Once dry, use striping tape or a thin brush to create vertical or horizontal stripes with white or pastel hues. You can also alternate colors for a playful look. Finish with a clear top coat to ensure your design lasts. This chic design is perfect for those who want a modern touch to their summer nails!
10. Cherry Watercolor Effect
For a soft and dreamy look, try the cherry watercolor effect that captures the essence of summer beautifully. This design is all about blending colors to create a stunning visual.
Start with a nude or white base coat. Then, using a small brush, apply cherry red and pastel pink polishes in random strokes, lightly blending the colors together while they are still wet. The goal is to achieve a soft watercolor look. Finish with a glossy top coat to enhance the colors. This design is perfect for casual summer outings or relaxed beach days.
11. Cherry Animal Print
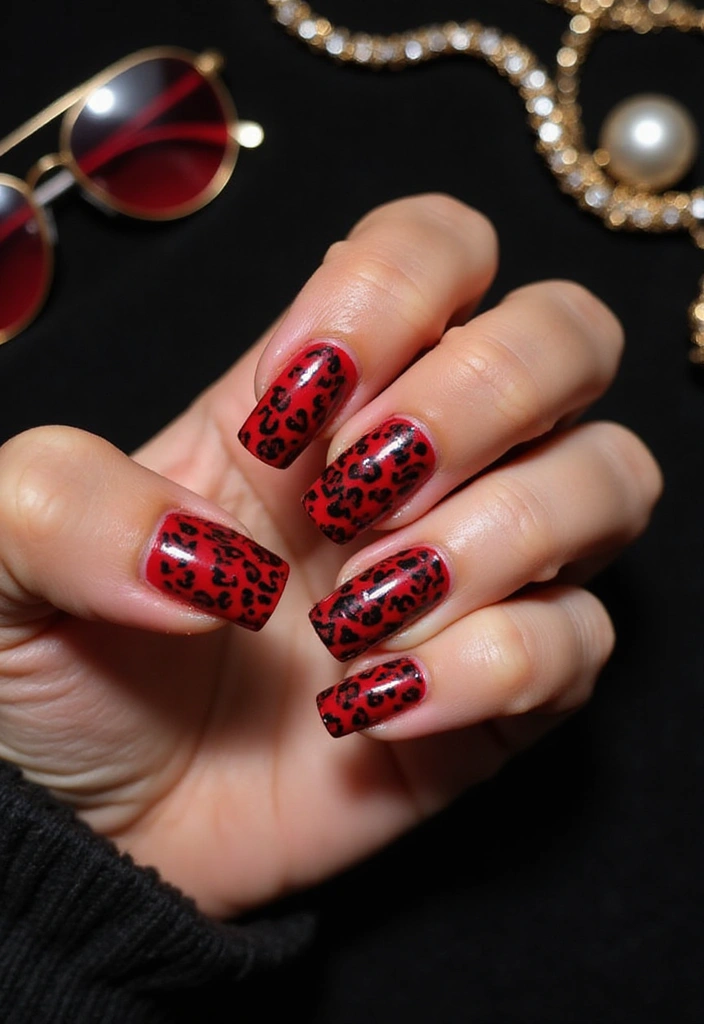
For the fashionistas, cherry animal print nails are a bold choice! This design combines the playful nature of cherry colors with the fierce look of animal prints.
Start with a bright cherry red base coat. Once dry, use a fine brush to create leopard spots or zebra stripes in black or dark brown. You can also use a sponge to dab on the animal print for a more blended effect. Finish with a clear top coat to keep the design intact. This playful yet fierce design is perfect for summer parties and gatherings, allowing you to showcase your bold personality!
12. Cherry Confetti

Add a festive touch to your nails with cherry confetti! This fun design is perfect for summer celebrations and parties.
Start with a cherry red base coat. Once dry, apply a layer of clear polish and sprinkle colorful confetti in various shapes and sizes on top. You can use circular confetti for a classic look or star-shaped confetti for a playful twist. Finish with a top coat to secure the confetti in place. This design is sure to bring joy and fun to your summer look!
13. Cherry Gradient Glitter
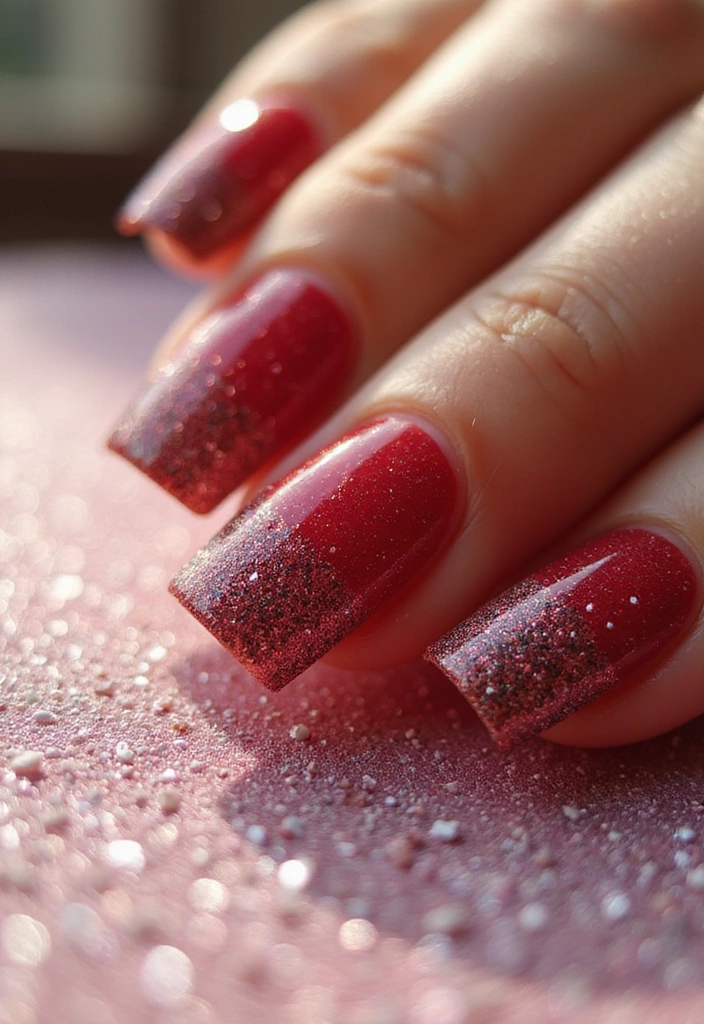
Combine the beauty of gradients with the sparkle of glitter in this cherry gradient glitter design! It's perfect for those who want to shine bright this summer.
Start with a cherry red base coat. Once dry, apply a fine layer of glitter polish from the tips down to the middle of the nail, creating a beautiful gradient effect. You can use a sponge to blend the glitter for a smoother transition. Finish with a glossy top coat to ensure the glitter stays put, making this design perfect for summer night outs!
14. Cherry Lace Design
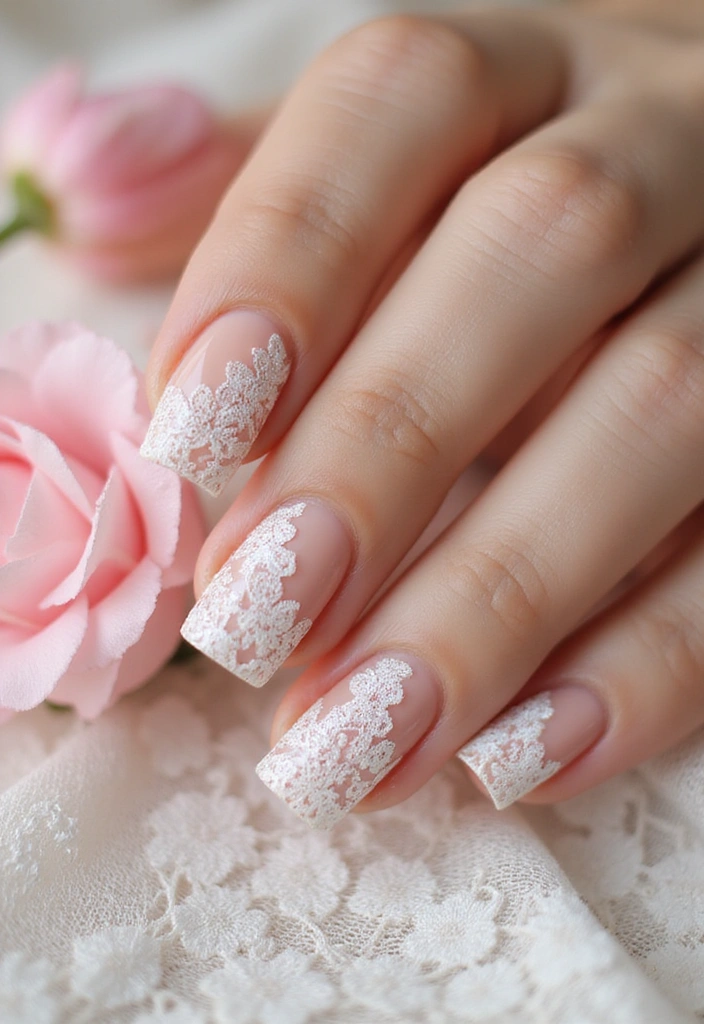
For a touch of elegance, try the cherry lace design that adds a romantic feel to your nails. This intricate art is perfect for summer weddings or formal events.
Start with a soft nude or pale pink base. Once dry, use a fine brush to create lace patterns in white or a pastel shade at the tips or across the entire nail. This design requires a steady hand but is worth the effort for its stunning results. Finish with a matte top coat for a chic look or a glossy top coat for a more traditional feel. This romantic design captures the essence of summer beautifully.
15. Cherry Tie-Dye
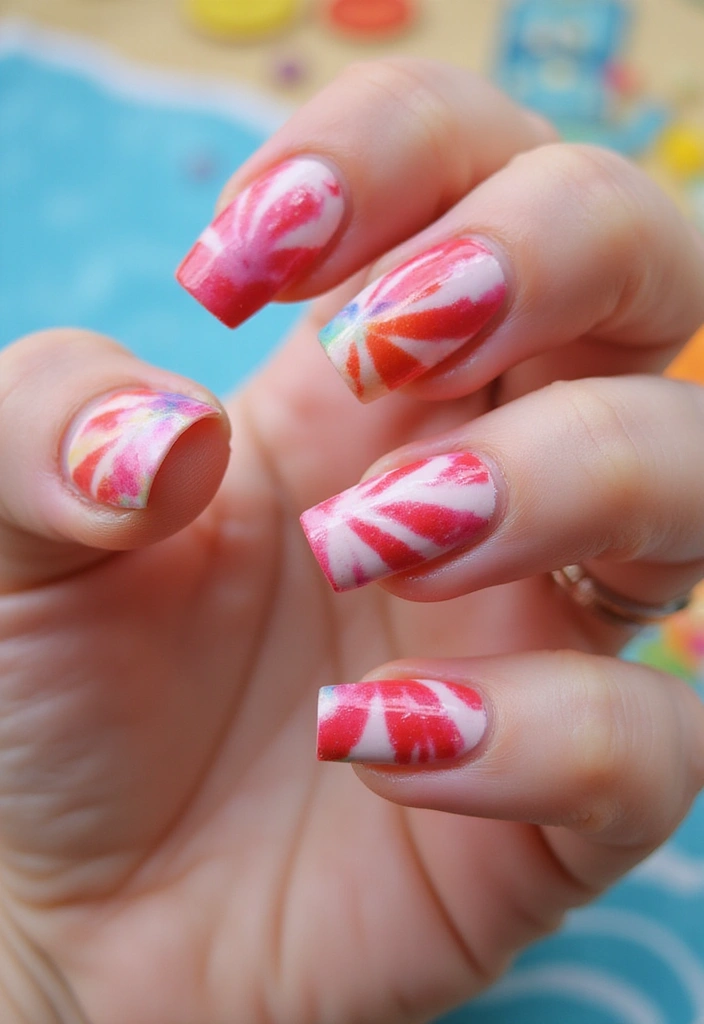
Embrace the fun and quirky vibes of summer with cherry tie-dye nails! This design is playful and colorful, making it perfect for those who love to express their individuality.
Start with a white base coat. Using a small brush, apply cherry red and pastel shades in random swirls and dabs, blending them slightly for a tie-dye effect. The key is to create a unique pattern on each nail. Finish with a glossy top coat for a vibrant look. This design is perfect for music festivals, beach days, or any fun summer outing!
Conclusion
With these 15 cherry-coded nail designs, transforming your look for summer has never been easier! Each design captures the vibrant spirit of the season while allowing you to express your creativity and style.
From classic elegance to playful fun, there's a design for everyone. Don't hesitate to mix and match styles or add personal touches to make them your own. Dive into the world of nail painting and let your fingertips shine this summer!


Ad Banner
Read on GoodNovel